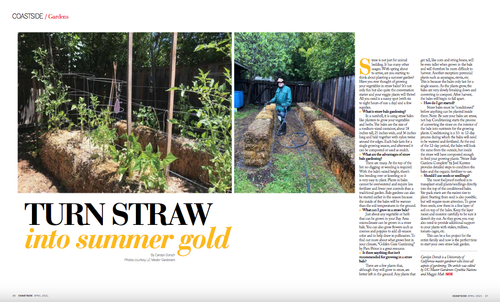
Straw is not just for animal bedding. It has many other usages. With spring about to arrive, are you starting to think about planting a summer garden? Have you ever thought of growing your vegetables in straw bales? It's not only fun but also quite the conversation starter and your veggie plants will thrive! All you need is a sunny spot (6-8 hours/day) and a few supplies.
What is straw bale gardening?
In a nutshell, it is using straw bales like planters to grow your vegetable and herbs. The bales are the size of a medium-sized container, about 18” tall, 21” wide, and 36” long and held together with nylon twine around the edges. Each bale lasts for a single growing season and afterward, it can be composted or used as mulch.
What are the advantages of straw bale gardening?
There are many. At the top of the list: no digging or weeding is required! With the bale's raised height, there's less bending over or kneeling so it is very easy to plant. Plants in bales cannot be overwatered and require less fertilizer and fewer pest controls than a traditional garden. Bale gardens can also be started earlier in the season because the inside of the bales will be warmer than the soil temperatures in the ground.
What can I grow in a straw bale?
Just about any vegetable or herb that can be grown in your bay area microclimate can be grown in a straw bale. You can also grow flowers such as cosmos and poppies to add all-season color and to help draw in pollinators. To find out more about what grows best in your climate, Golden Gate Gardening by Pam Peirce is a great resource.
Is there anything that isn't recommended for growing in a straw bale?
There are a few plants that, although they will grow in straw, are better left in the ground. Any plants that get tall, like corn and string beans, will be even taller when grown in the bale and will therefore be more difficult to harvest. Another exception: perennial plants such as asparagus, stevia, etc. This is because the bales only last for a single season. As the plants grow, the bales are very slowly breaking down and converting to compost. After harvest, the bales
will begin to fall apart.
How do I get started?
Straw bales must be “conditioned” before anything can be planted inside them. NOTE: be sure your bales are straw, not hay. Conditioning starts the process of converting the straw on the interior of the bale into nutrients for the growing plants. Conditioning is a 10-12 day process during which time the bales will need to be watered and fertilized. At the end of the 12-day period, the bales will look the same from the outside but inside, the straw will have composted enough to feed your growing plants. Straw Bale Gardens Complete by Joel Karsten provides detailed steps to condition the bales and the organic fertilizer to use.
Should I use seeds or seedlings?
The most foolproof method is to transplant small plants/seedlings directly into the top of the conditioned bales. Six-pack starts are the easiest size to plant. Starting from seed is also possible, but will require more attention. To grow from seeds, sow them in a fine layer of soil on top of the bales. Keep the layer moist and monitor carefully to be sure it doesn't dry out. As they grow, you may also need to provide additional support to your plants with stakes, trellises, tomato cages, etc. This can be a fun project for the entire family and now is the perfect time to start your own straw bale garden.
Carolyn Dorsch is a University of California Master Gardener who loves all aspects of gardening. The article was edited by UC Master Gardeners Cynthia Nations and Maggie Mah.
Attached Images:
